

Diagram Types for Interior Designers
A practical look at the main diagram types interior designers rely on, from bubble diagrams and floor plans to elevations, sections, mood boards, and 3D models, with guidance on which fits each stage.
 Elif Ayse Sen24 May 20236 Mins read946

Table of Contents Show
Diagrams for interior designers are visual tools that translate spatial ideas into clear, shareable drawings. From bubble diagrams and floor plans to elevations, sections, mood boards, and 3D models, each type serves a specific stage of the design process, helping designers plan layouts, test relationships between spaces, and present concepts to clients with confidence.
Learning to read and produce these drawings early is one of the most useful skills an interior design student can build. A good diagram removes ambiguity. Instead of describing a room in words, you show how people move through it, where light falls, and how furniture relates to structure. That clarity keeps projects on track and cuts down on costly misunderstandings between designers, contractors, and clients.
The sections below break down the most common diagrams for interior designers, explain what each one is for, and show when to reach for it during a project.
Why Diagrams Matter in Interior Design
Interior design work moves through phases: research, concept, planning, documentation, and presentation. Different diagrams belong to different phases. A rough bubble diagram helps you think out loud in the first week of a project, while a measured floor plan supports construction months later. Using the right drawing at the right moment keeps your thinking visible and your decisions defensible.
Diagrams also protect the design intent. When a plan, an elevation, and a section all describe the same space, they cross-check each other and catch conflicts before they reach the site. That coordination is exactly what separates a polished set of documents from a loose collection of sketches.
💡 Pro Tip
Keep every diagram at a consistent scale within a single project set. When a client flips from a floor plan to an elevation and the proportions read the same, they trust the drawings faster. Mixing scales without labeling them is a common source of confusion in early client reviews.
Common Types of Diagrams for Interior Designers
Here are the diagram types you will use most often, roughly in the order they appear during a project.
Bubble Diagrams
Bubble diagrams are conceptual drawings that show the relationships between spaces using simple circles. Each bubble stands for a room or zone, and the lines between them signal adjacency, circulation, or a needed connection. Because they carry no exact measurements, they are quick to draw and easy to revise, which makes them ideal for the earliest planning stage when you are still testing how a space should be organized.
Designers use bubble diagrams to work out flow before committing to walls. You might sketch five versions in an hour, comparing how the kitchen sits next to the dining area or how private and public zones separate. This fast, low-stakes exploration is where many strong layouts begin. For a step-by-step method with symbols and examples by building type, see our guide to the bubble diagram in architecture.

Floor Plans
Floor plans are the most familiar diagram in interior design. They give a bird’s-eye view of a space, showing the placement of walls, doors, windows, and furniture along with accurate dimensions. A floor plan fixes the spatial relationships between areas and becomes the reference every other drawing is measured against.
Once your bubble diagram settles into a workable arrangement, the floor plan turns that idea into something buildable. It carries the layout, the clearances around furniture, and the circulation paths, so it stays in use from schematic design all the way through construction documentation. Our article on turning a bubble diagram into a floor plan walks through that transition in four steps.
📌 Did You Know?
The word “parti” that designers use for a project’s core organizing idea comes from the French phrase “prendre parti,” meaning to take a position or make a decision. A single parti diagram often captures the whole scheme in one sketch, and it remains a standard teaching tool in design schools today.
Elevations
Elevations are flat, straight-on drawings of a vertical surface, usually a single wall. They record height, width, and the arrangement of features such as windows, doors, cabinetry, and built-in elements. Where a floor plan answers “how is the space arranged,” an elevation answers “what does this wall look like.”
These drawings matter most when you present the visual character of a design. Elevations communicate scale and proportion, so a client can judge whether a feature wall, a run of shelving, or a set of cabinets feels right before anything is built.

Section Drawings
Section drawings show a cutaway view, as if you sliced through the space vertically and looked at the exposed face. They reveal interior details that plans and elevations miss, such as ceiling heights, floor build-ups, stair relationships, and the way finishes and fixtures sit within the structure.
Sections are valuable when a project has height changes, layered ceilings, or custom joinery. Both 2D and 3D sections help designers and clients understand construction elements and the true vertical experience of a room, not just its footprint.
Mood Boards
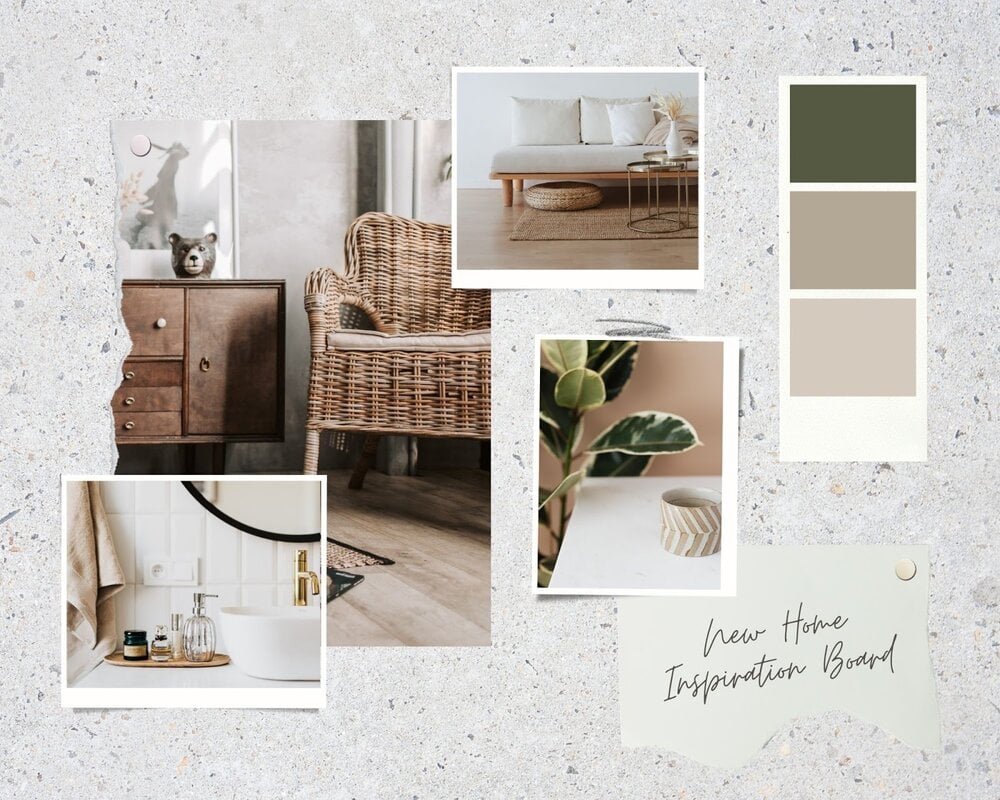
Mood boards are visual collages that carry the aesthetic and emotional direction of a design. They gather images, colors, textures, materials, and reference photos into one frame so everyone can agree on the feel of a space before decisions are locked in. Unlike measured drawings, a mood board is about atmosphere rather than dimension.
Designers build mood boards to align expectations. When a client signs off on a palette of warm woods, soft linens, and matte brass, later material choices have a clear reference to follow. That shared visual language keeps a project consistent from concept through styling.

3D Models
3D models are digital representations of a space that let clients experience a design before it exists. They turn flat plans into rooms you can walk through, adjust lighting on, and view from any angle. This immersive quality makes 3D models one of the strongest presentation tools available to a designer.
You can build these models to test interior design concepts and refine details that are hard to judge in 2D. Dedicated software such as Autodesk 3ds Max, Rhino, and the free, open-source Blender offer advanced modeling and rendering, so you can produce detailed interior design diagrams in 3D and photoreal views from the same file.

Diagram Types at a Glance
The table below summarizes what each diagram does and the stage where it earns its place in your workflow.
| Diagram Type | Purpose | When to Use |
|---|---|---|
| Bubble Diagram | Map relationships and flow between spaces | Earliest concept and space-planning stage |
| Floor Plan | Show measured layout, walls, and furniture | Schematic design through construction |
| Elevation | Present the vertical face of a wall | Design development and client review |
| Section Drawing | Reveal cutaway heights and construction detail | Height changes, ceilings, custom joinery |
| Mood Board | Set aesthetic, color, and material direction | Concept phase and material approval |
| 3D Model | Create immersive, realistic views of a space | Presentation and final client sign-off |
How to Choose the Right Diagram
The right diagram depends on the question you are trying to answer. If you are still deciding how spaces connect, stay loose with bubble diagrams. Once the arrangement is settled, move to a measured floor plan. When a client asks what a wall will look like, draw an elevation. If they struggle to picture the finished room, a 3D model closes the gap.
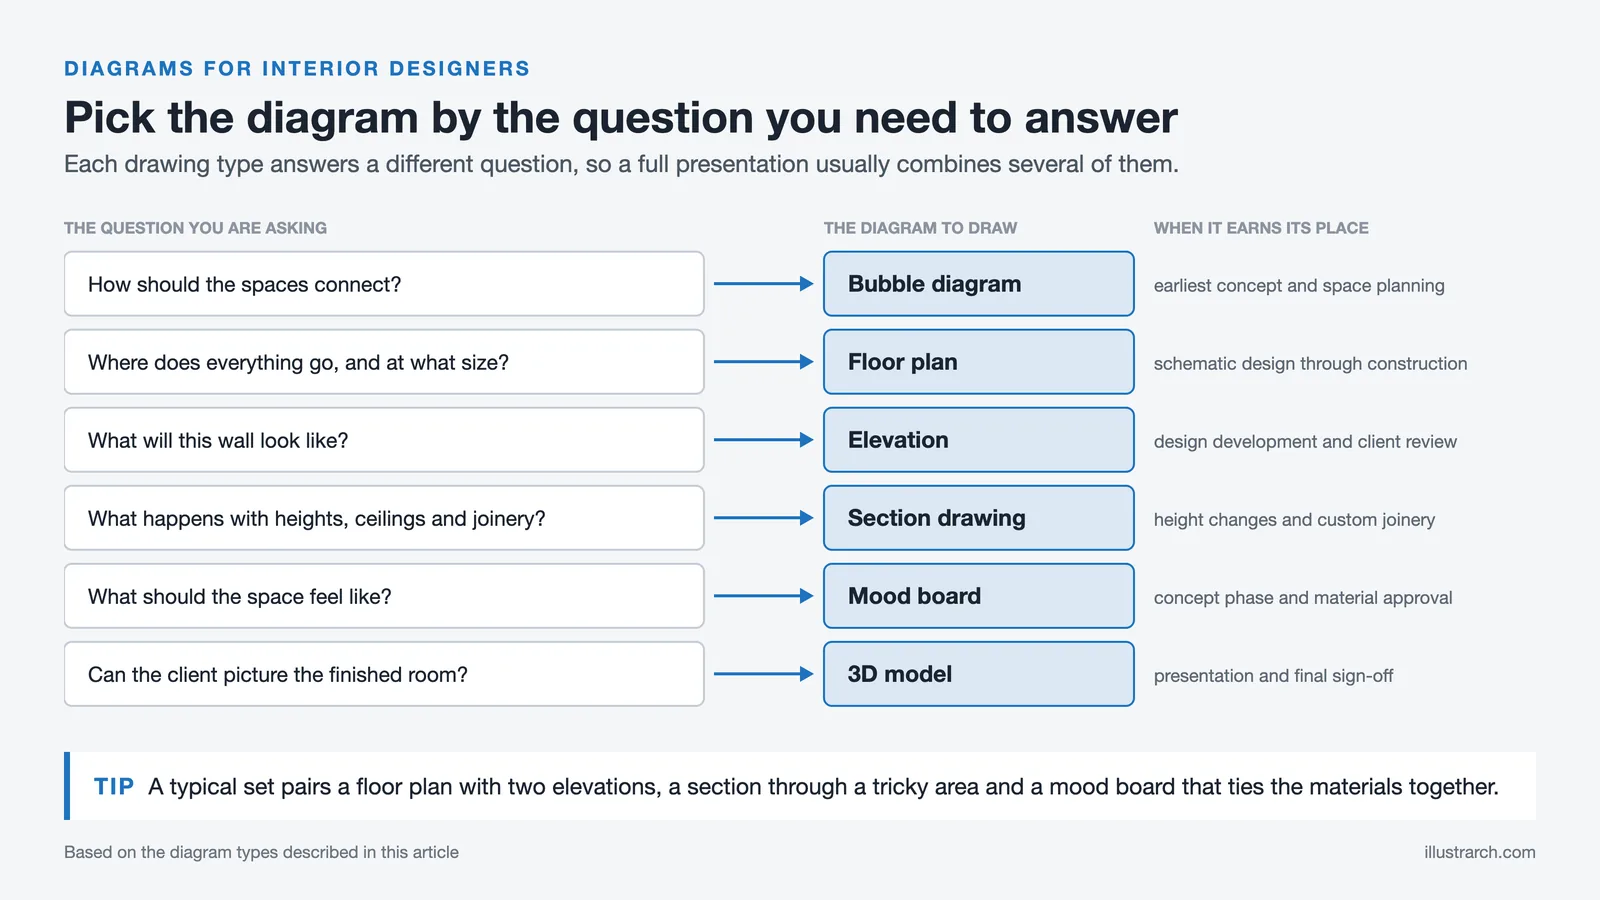
Most projects use several diagram types together. A single presentation might pair a floor plan with two elevations, a section through a tricky area, and a mood board that ties the materials together. Learning to combine them, rather than relying on one favorite, is what makes your communication complete.
⚖️ Hand vs Digital Diagrams at a Glance
✔️ Hand-drawn: fast to sketch, great for early bubble diagrams, no software needed, feels personal in client meetings
✖️ Digital: precise dimensions, easy to revise and reuse, strong for elevations and 3D, but a steeper learning curve and more setup time
For students building a portfolio, professional bodies such as the American Society of Interior Designers stress clear graphic communication as a core skill. Strong diagrams signal that you can think spatially and present ideas that clients and contractors can act on. If you want to see how designers structure their thinking further, review how a parti diagram distills an entire concept into one organizing sketch.
Putting It All Together
Master these diagram types and you gain a flexible visual vocabulary for every stage of a project. Start rough with bubble diagrams, firm up with plans, elevations, and sections, set the tone with a mood board, and seal the presentation with a 3D model. The more fluently you move between them, the more clearly your design intent reaches the people who need to understand it.





Futuro House Production Revived in Finland After Decades-Long Hiatus
A Facebook listing for abandoned moulds led to the first new Futuro...
 illustrarch Editoral Team3 Mins read

Building Your Dream Home in NSW: What You Should Know About Montgomery Homes
Montgomery Homes has been building across Sydney, Newcastle, the Hunter, Wollongong and...
illustrarch Editoral Team4 Mins read

Designing a Home Theater: Where Drapery Fits Into the Plan
In a media room the curtains are a performance layer, not decoration....
illustrarch Editoral Team3 Mins read
Stacking Diagram: How to Allocate Uses Floor by Floor
A stacking diagram assigns each use in a brief to a level,...
 Sinan Ozen6 Mins read


Leave a comment