

Physical Model in Architecture
Architectural representation is universal and timeless, as all architects know. One of the most discussed subjects of every period in architecture is architectural representation undoubtedly. All architects and offices, who have well developed architectural representation and presentation techniques, have come to the fore worldwide. Architecture tries to give universal products that will appeal to every period and every person, so its representations and presentations should be understood by everyone.

Table of Contents Show
Architectural presentation is universal and timeless, as all architects know. One of the most discussed subjects of every period in architecture is architectural representation undoubtedly. All architects and offices, who have well developed architectural representation and presentation techniques, have come to the fore worldwide. Architecture tries to give universal products that will appeal to every period and every person, so its representations and presentations should be understood by everyone.
That’s why architects make technical drawings and all other 3D drawings using universal symbols. Recently, architectural representation has adapted to digital life, like every other area in our lives, and it has become indispensable to present projects through renders.
Do you think 3D renders replace physical models? We think not! Because the physical model is a unique technique used by all architects from the past to the present, both in the process and at the end of their projects.
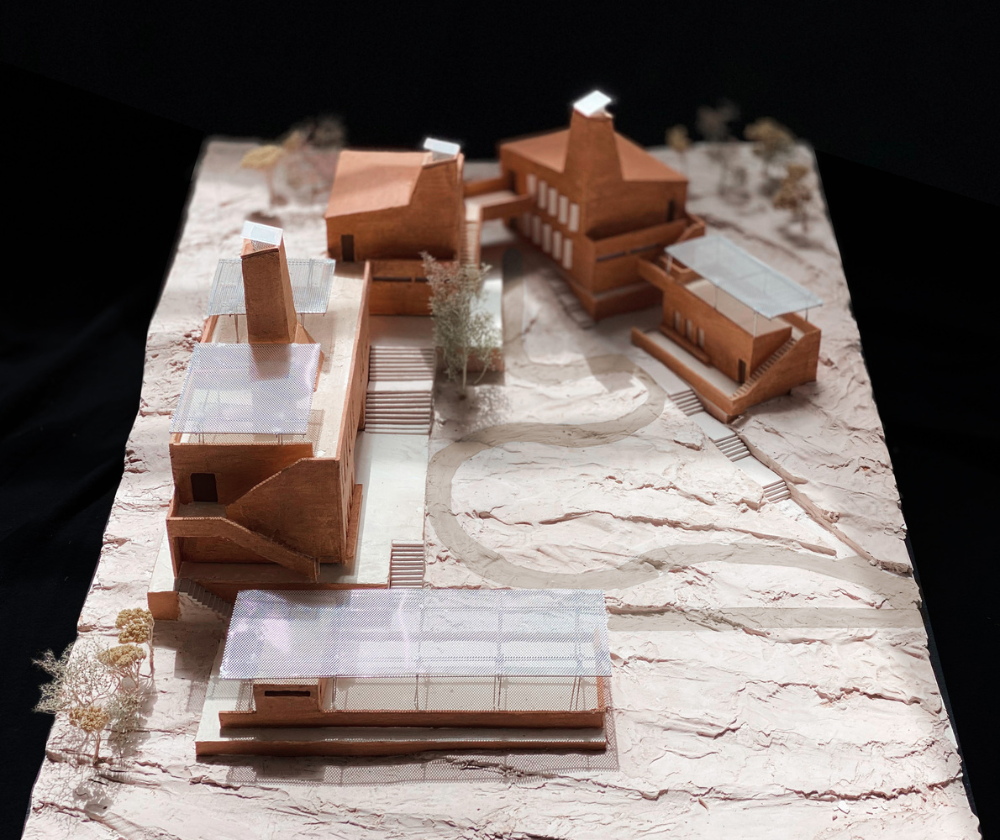
First, let’s talk about the place of physical models in the design process. Both in professional life and architecture students work on physical models to develop concepts. First, a model of the project site and its topography is made in appropriate scales as 1/200, 1/500 or 1/1000 depending on the size of the project area. Afterwards, mass model works, concrete and abstract models are made with the desired materials, without the concern of presentation. These studies are sketches, but are critical for architects to develop the project and engage with each other.
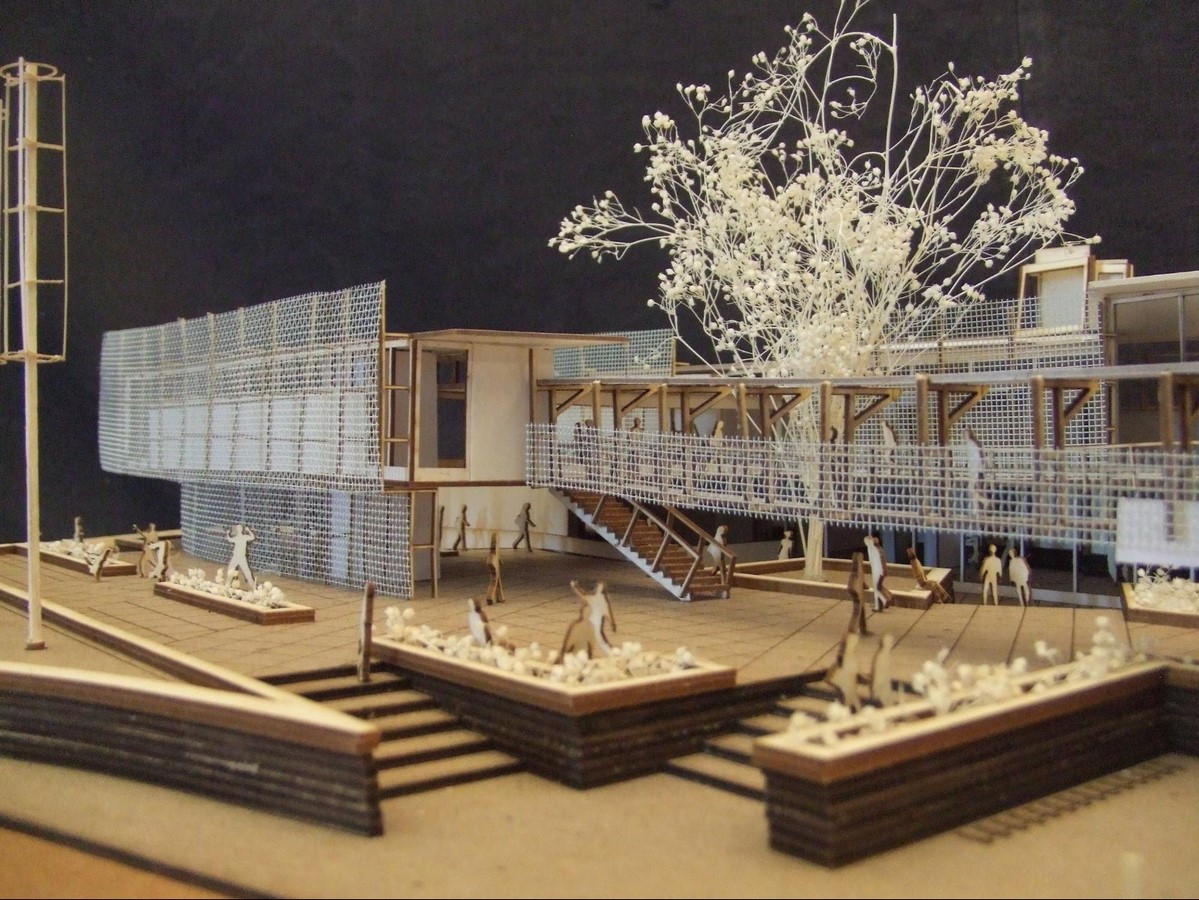
On the other hand, models are made to be presented in architectural competitions, in professional project presentations to customers, and in the juries of design courses. Fancy physical models are a must-have presentation technique for all architects and architecture students. You can present your style, your approach to the project and your atmosphere, and the environment you want to create in textures and colors that suit you. You are completely free with the materials. However, adopting the motto “less is more” in modeling will ensure a more effective presentation.
When making a physical model, you can work on different materials to highlight the spaces, relationships or textures you want to highlight. In general, models created with 1 or 2 colors and similar materials are quite good. If you have made landscaping, we recommend that you process them into your model in an abstract language with appropriate textures. For example, if your model does not have a critical feature of trees to support your concept, make them from a low-key material.
If you want to improve your physical model skills, you can examine the models made by famous architects, research the award-winning competition project models and construction techniques.
Types of Physical Models
Physical models fall into several categories, each serving a distinct purpose. Concept or massing models strip a design down to basic volumes so the designer can study proportion and silhouette early on. Site models place the project within its topography and neighboring buildings to test how it relates to its surroundings. Detail models zoom in on a facade, joint, or structural element at a large scale. Presentation models are the polished, final pieces built to communicate the resolved design to clients or competition juries. Knowing which type you need keeps effort focused and prevents over building a model that is meant only to test an idea.
Physical Models Versus Digital Renders
Digital renders and physical models answer different questions, which is why most practices use both. Renders excel at lighting, material realism, and producing many views quickly, and they are easy to share online. Physical models offer something renders cannot: a tactile, three dimensional object that can be walked around, picked up, and understood at a glance. Viewers grasp scale and spatial relationships almost instantly from a model, while a render asks them to imagine depth from a flat image. Rather than competing, the two methods reinforce each other across the life of a project.
Working Materials and Tools
Material choice shapes how a model reads. Foam board and cardboard are inexpensive and fast for study models, while balsa wood, basswood, acrylic, and metal sheets give presentation models a refined finish. Restraint usually wins, since a model built from one or two materials and a limited palette reads as cleaner and more intentional. For tools, a sharp scalpel and a steel ruler handle most cuts, while a cutting mat protects surfaces and keeps lines straight. Where budget allows, laser cutting delivers precise, repeatable parts that are difficult to achieve by hand.
Tips for Stronger Models
A few practical habits improve almost any build. Plan your cuts before touching material, and measure twice to avoid wasted sheets. Apply glue sparingly to keep joints clean and prevent warping in thin pieces. Treat landscaping and entourage abstractly so they support the design without stealing attention. Build a base that is rigid enough to carry the model without bending. Finally, study models made by famous architects and award winning competition entries to learn how professionals handle texture, color, and scale, then adapt those lessons to your own working style.
The Enduring Value of Models
Despite decades of digital advancement, physical models remain a core part of architectural practice and education. They slow the designer down in a productive way, forcing decisions about structure, proportion, and assembly that a screen can hide. They also create a shared object that teams, clients, and juries can gather around and discuss, making feedback more immediate and collaborative. For students, model making builds craft and spatial intuition that carry into every later project. As a timeless companion to drawing and rendering, the physical model continues to earn its place on the desk.


Sydney’s Buildings Are Ageing Faster Than Most Owners Realise
There is a wave of building deterioration moving through Sydney's property stock...

Famous Buildings in Asia: 6 Imperial Palaces That Shaped a Continent
A focused look at six iconic buildings in Asia, each an imperial...

10 Signs It’s Time to Upgrade Your Property Fence
Table of Contents Show Repairs Keep Piling UpPosts Are LeaningBoards Are Cracked...

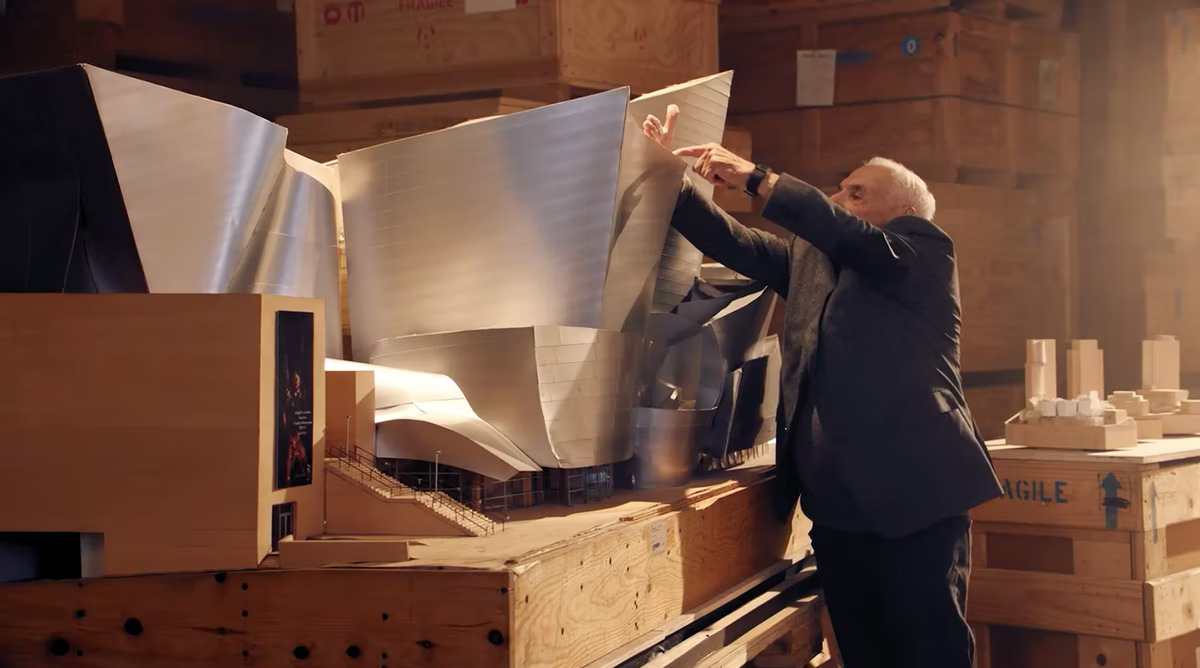
Walt Disney Concert Hall: Frank Gehry’s Stainless Steel Symphony in Los Angeles
Frank Gehry's Walt Disney Concert Hall took 16 years from initial design...

Leave a comment