

From Site Outline to 3D Model to Final Renders with Rendair
A house develops in seven steps with Rendair: a footprint sketched over a site photo, a bubble diagram, a floor plan, an overhead render, a generated 3D model, an eye-level view and a rendered section.
 Elif Ayse Sen10 November 20263 Mins read1
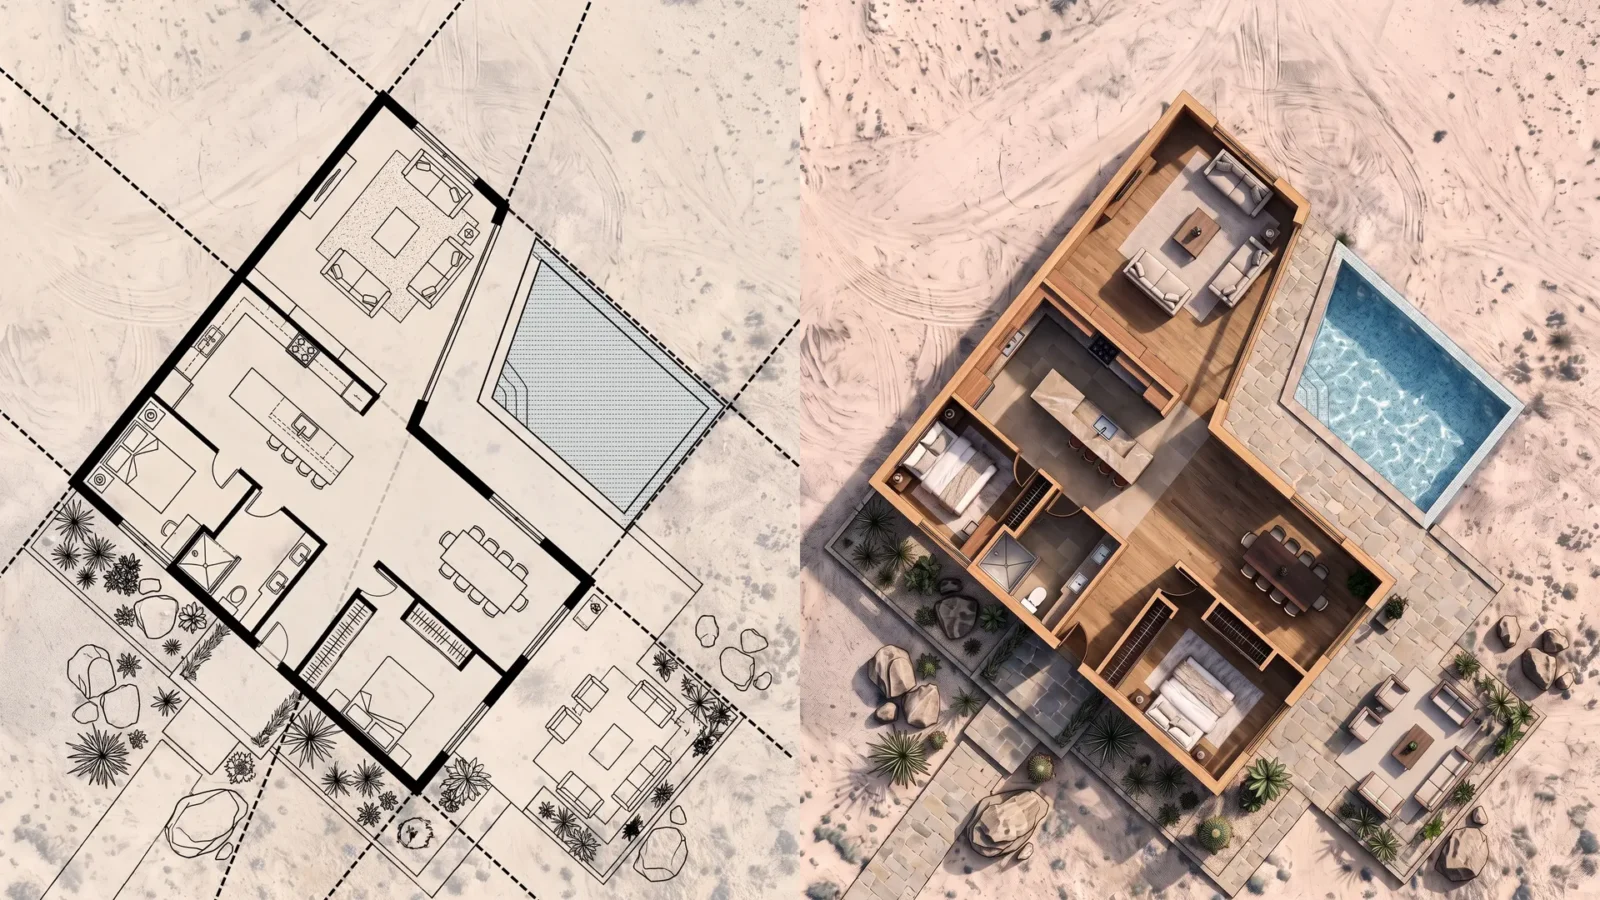
Table of Contents Show
A house can begin with a few lines over a site photo. In this example, the first sketch places the building around a pool. A bubble diagram maps how the rooms connect, a floor plan turns those relationships into a layout, and a 3D model lets you see the house from the terrace or cut through it in section.


Here’s how the project develops across seven steps, and which Rendair tools you can use along the way.
1. Sketch the building footprint on the site
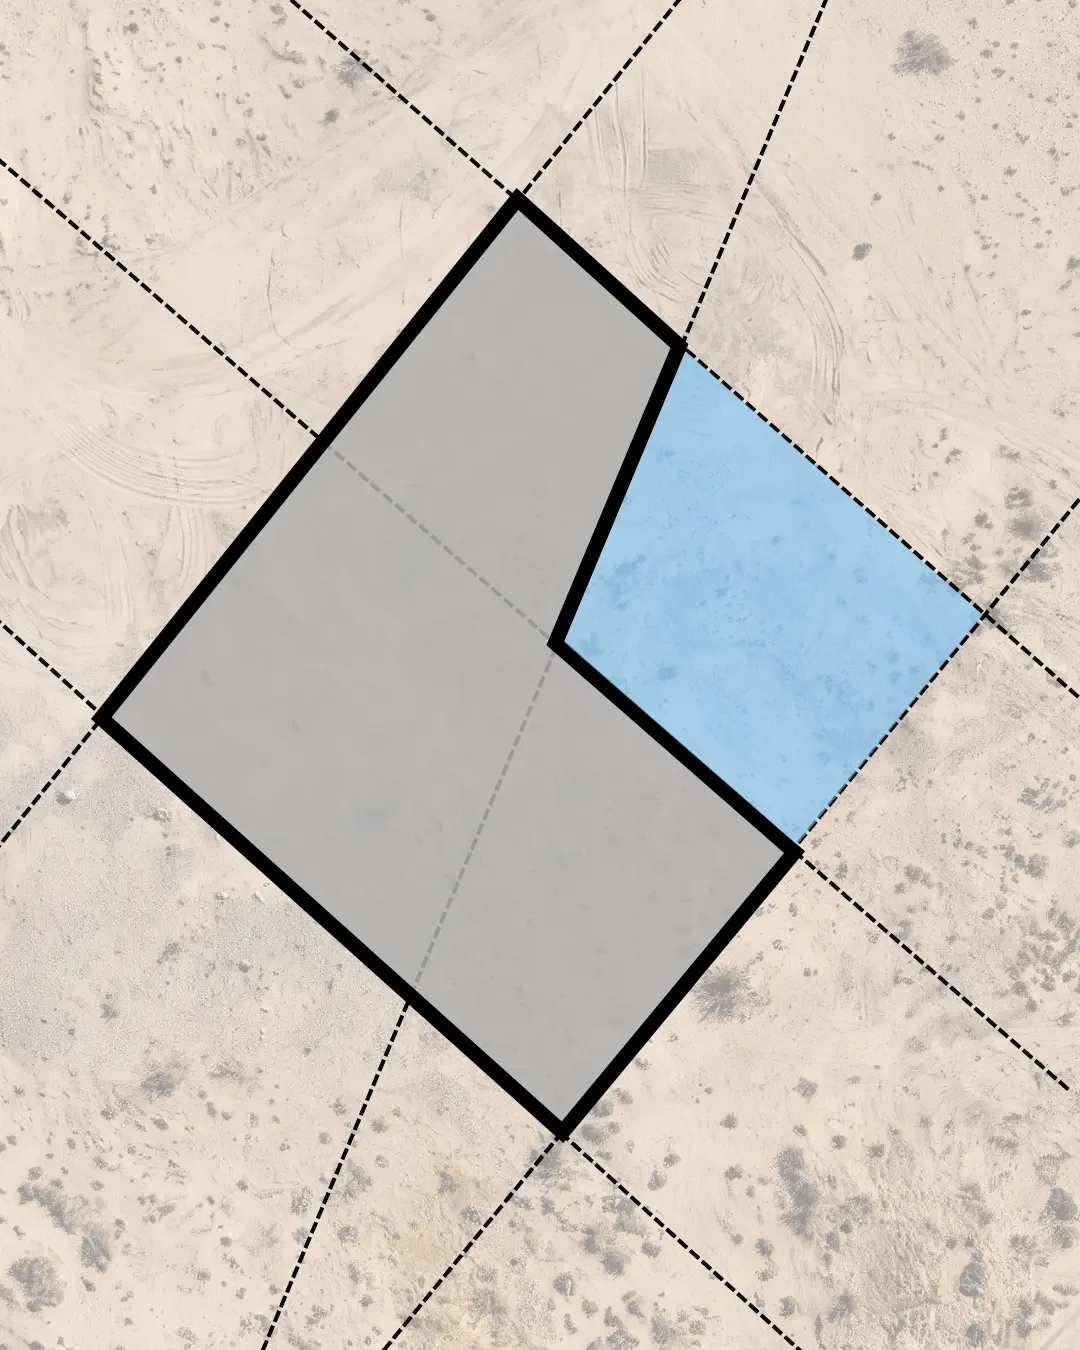
Open Sketch to Render or Floor Plan to Render and upload a site photo. Use the sketching tools to trace the proposed footprint directly over the image. In this example, the outline wraps around the pool, giving the living spaces an outdoor area to face.
2. Map the rooms and circulation
On the sketch, use bubbles to mark the main spaces and arrows to show how people move between them. Here, the diagram connects the living room, kitchen, dining area, and outdoor lounge while showing where the two bedrooms fit. It’s a quick way to test whether the rooms relate to one another as intended.
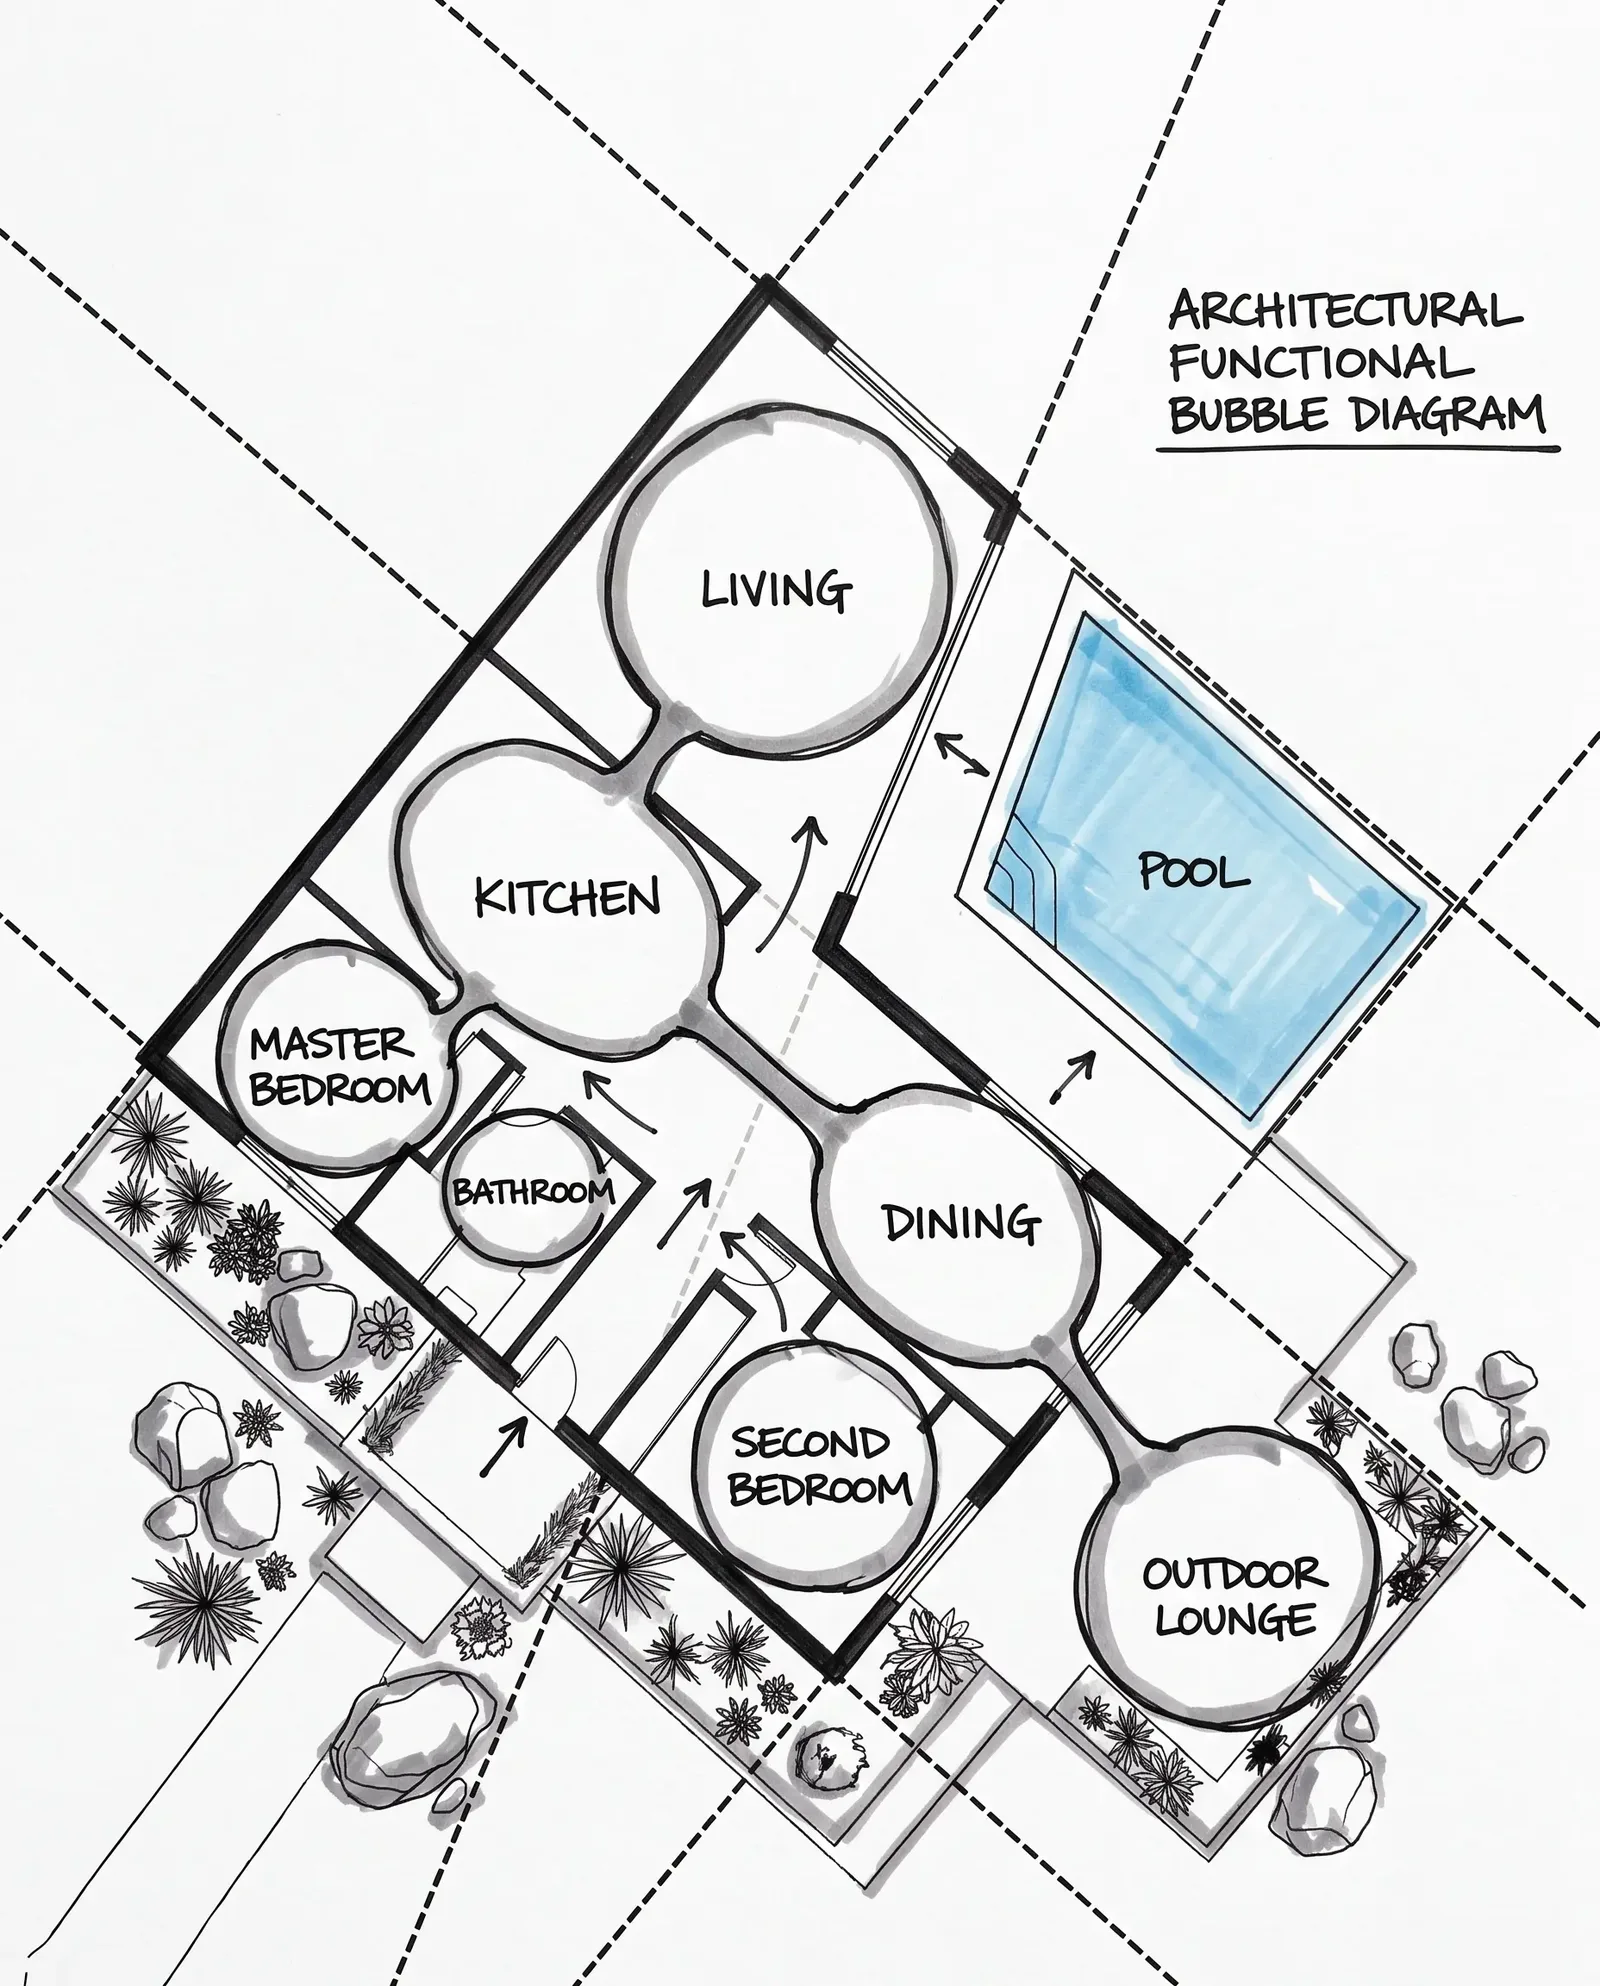
3. Develop the diagram into a floor plan
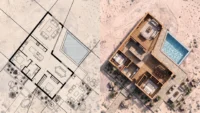
Replace the bubbles with a clear drawing of walls, openings, and furniture. You can develop it by hand or in your usual drafting software, then bring it into Rendair. In this plan, the kitchen island and dining table help explain how the shared spaces are used, while the terrace connects the house to the pool.
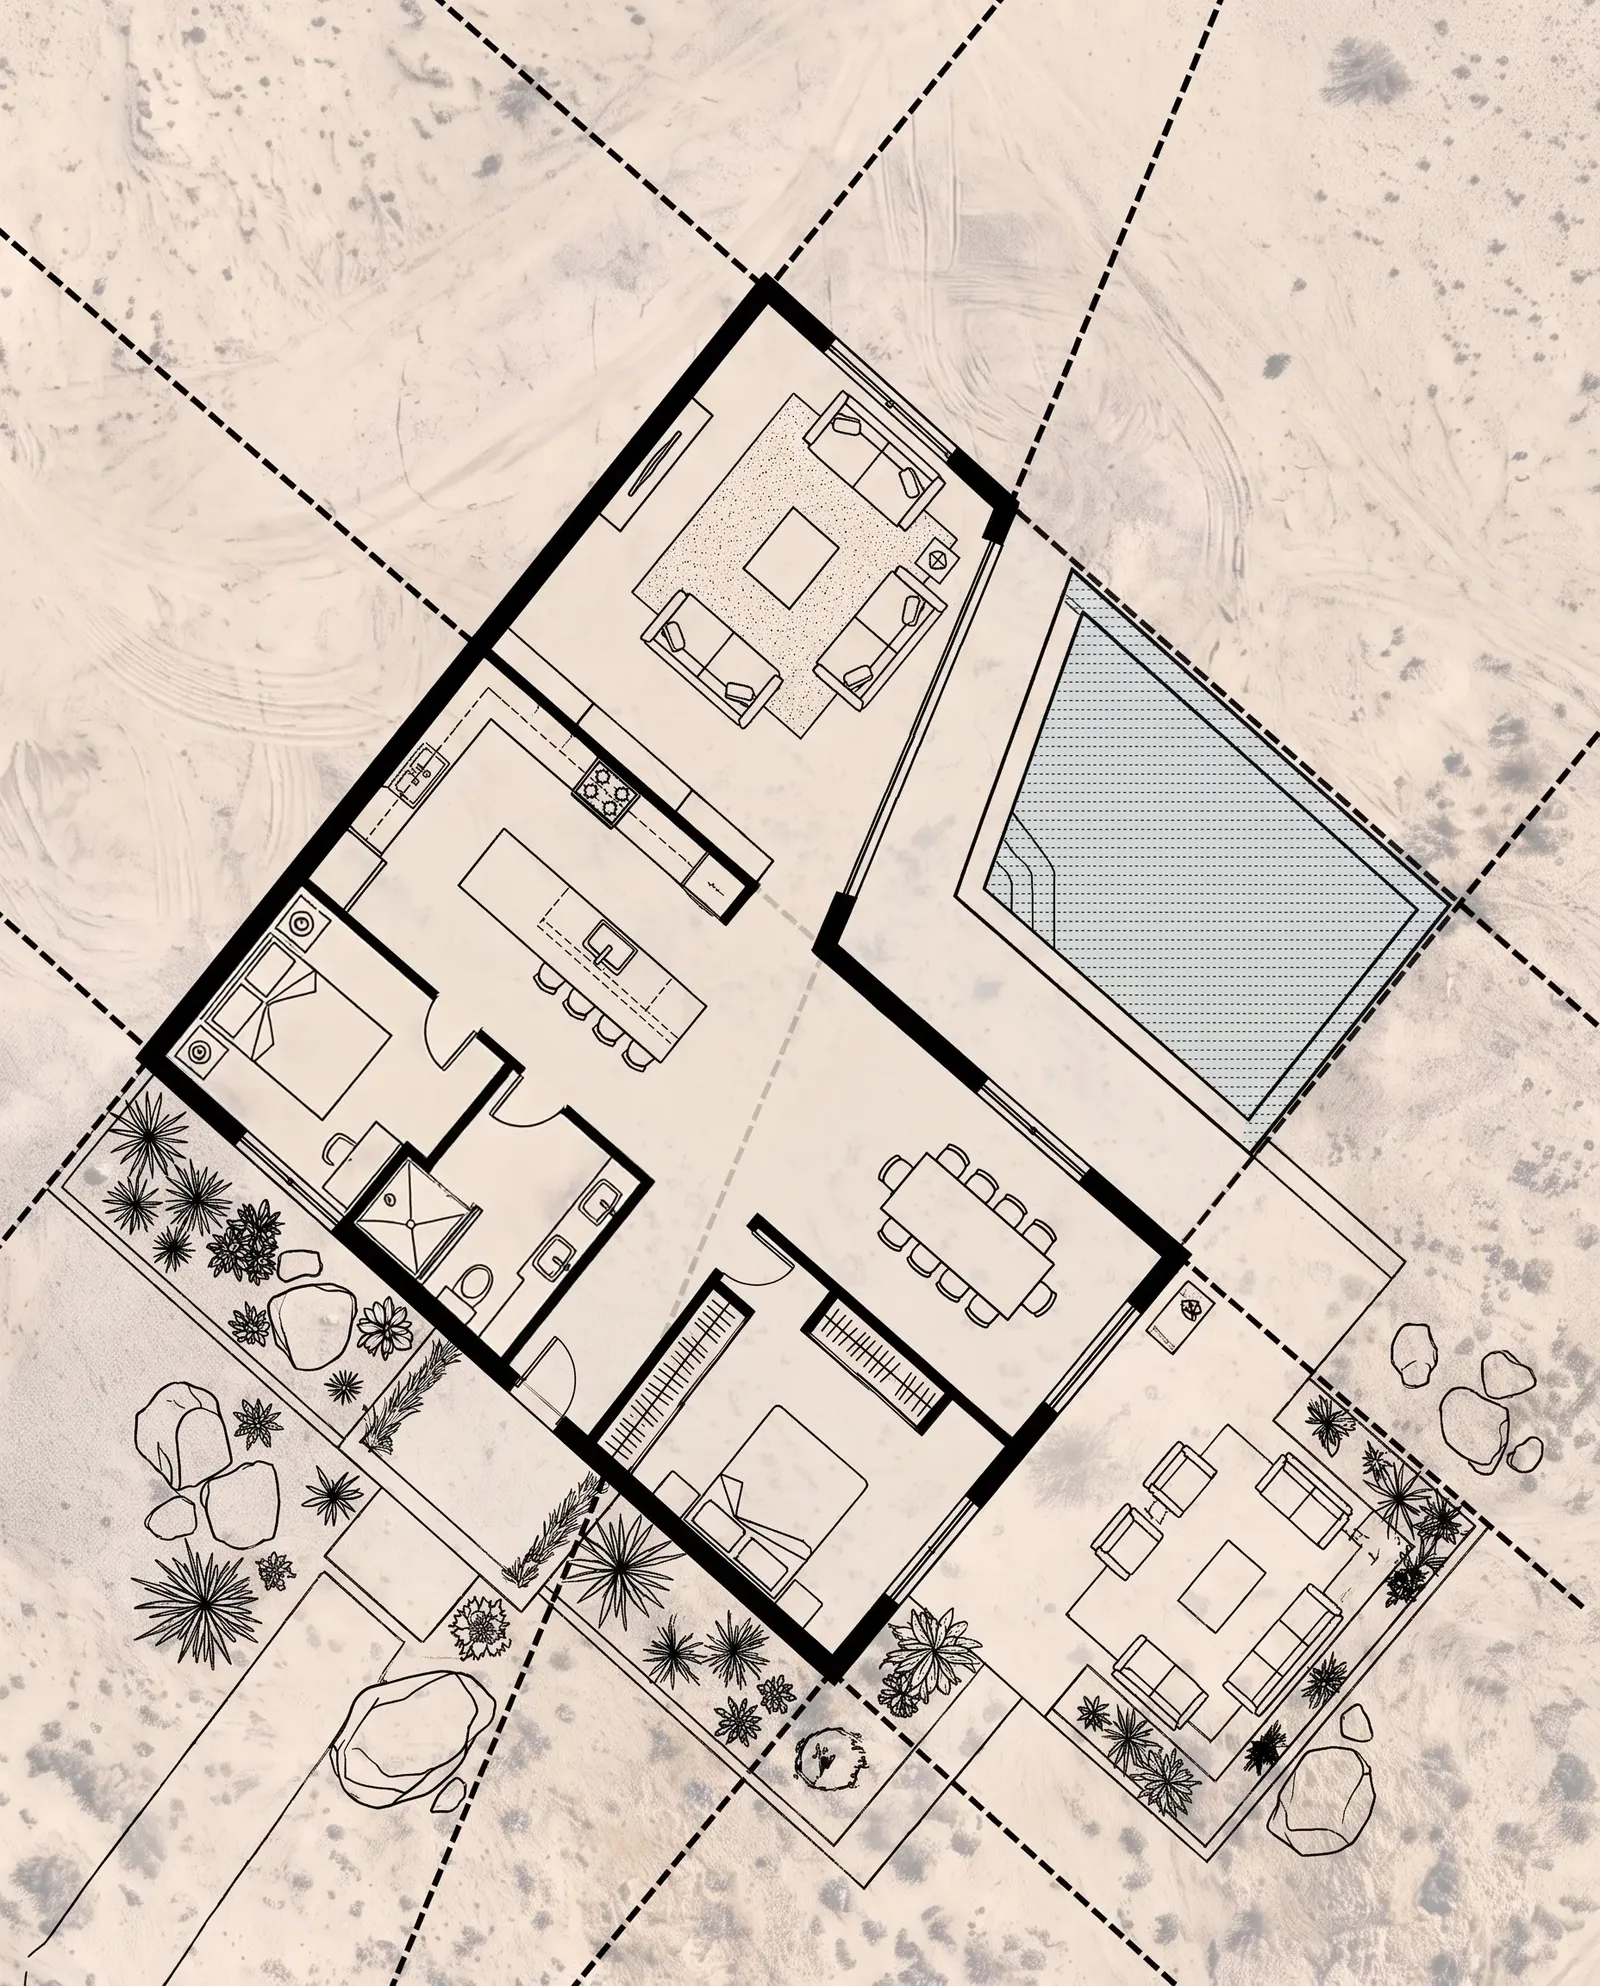
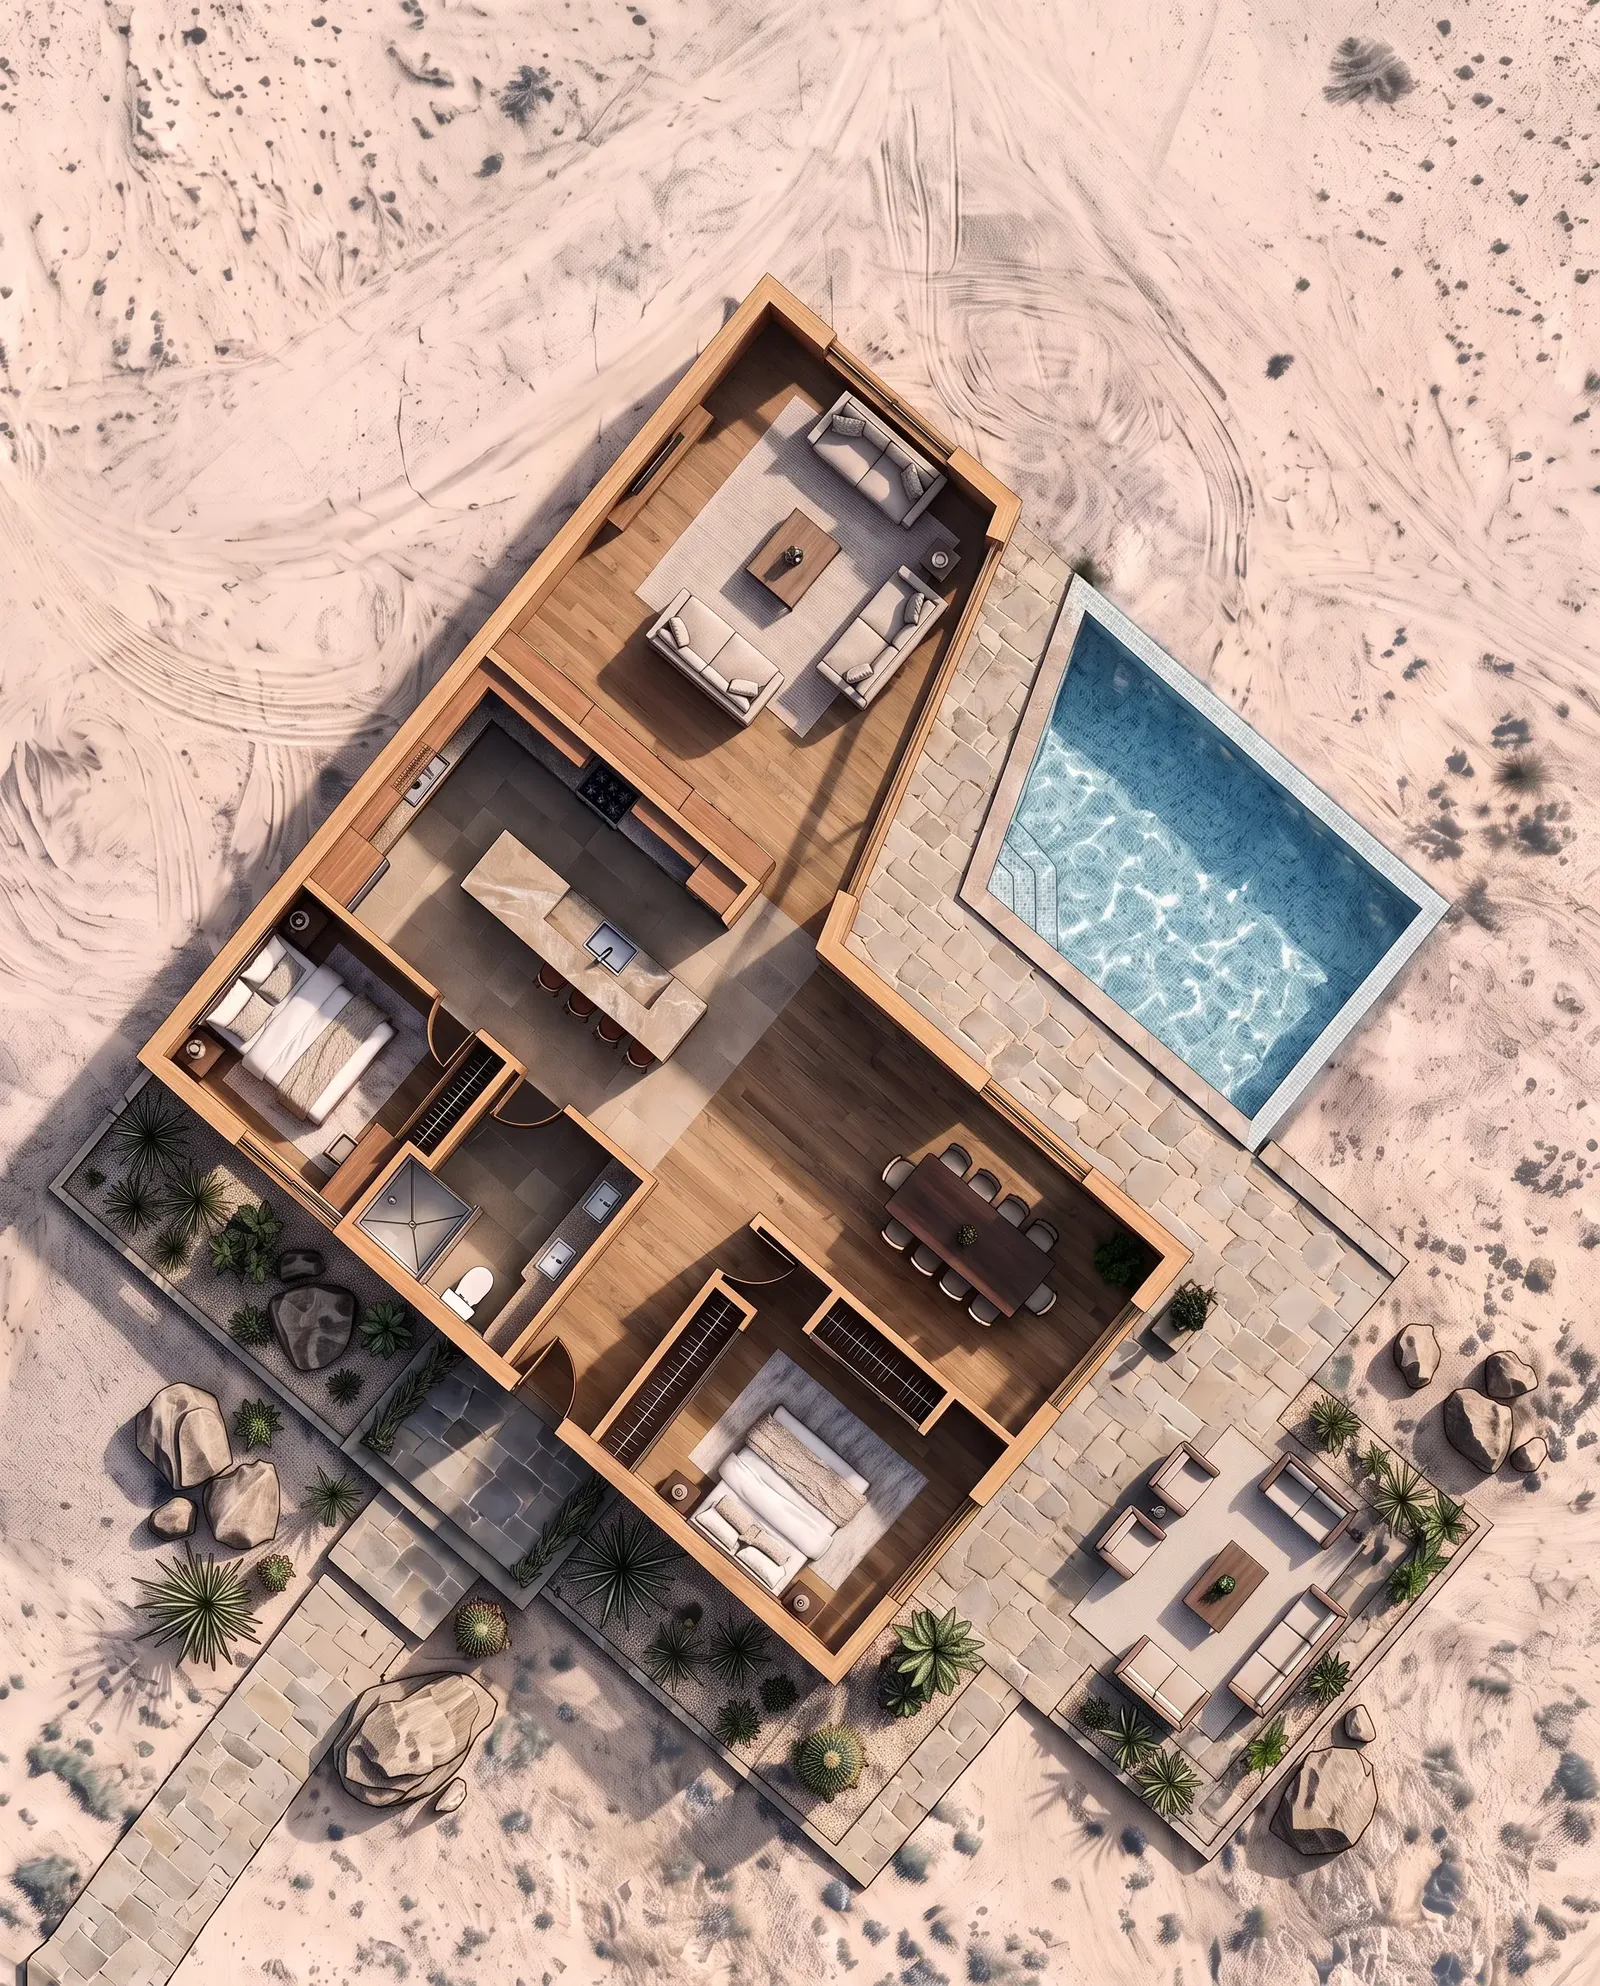
4. Create a realistic overhead view
Upload the drawing to Floor Plan to Render and describe the materials and atmosphere you want to explore. The overhead render in this example uses warm timber floors and stone paving to make the transition between interior and terrace easy to read. This image is useful when a client wants to understand the layout and get a feel for the space at the same time. Explore Floor Plan to Render.
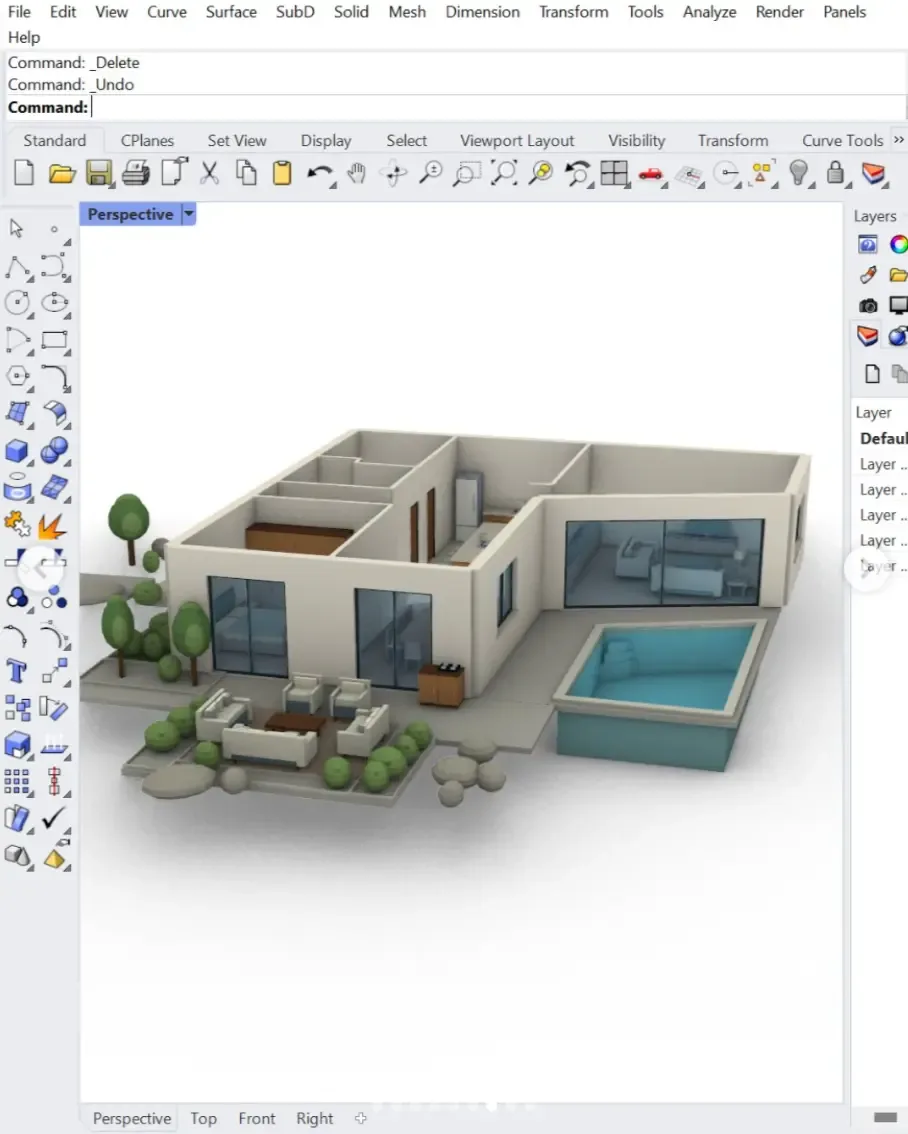
5. Generate a 3D model from the plan
Upload the same floor plan to Floor Plan to 3D Model. Add a short prompt for details the plan leaves open, choose Draft, Standard, or Detailed, and generate the model. Then rotate it to see how the rooms, glazing, and outdoor spaces relate. In the carousel, a view from the pool side reveals how the house opens onto the terrace. Watch the Floor Plan to 3D Model tutorial.
6. Render a viewpoint or export the model for editing
Click Render above the generated model or open 3D Model to Render. Set the camera angle you want, describe the materials and lighting, and generate the image. An eye-level view from the terrace, for example, can show what it feels like to approach the living room from outside. Explore 3D Model to Render.
If the geometry needs further work, download the model as a GLB and open it in any 3D software like Rhino, where you can check it against the plan and refine the design.
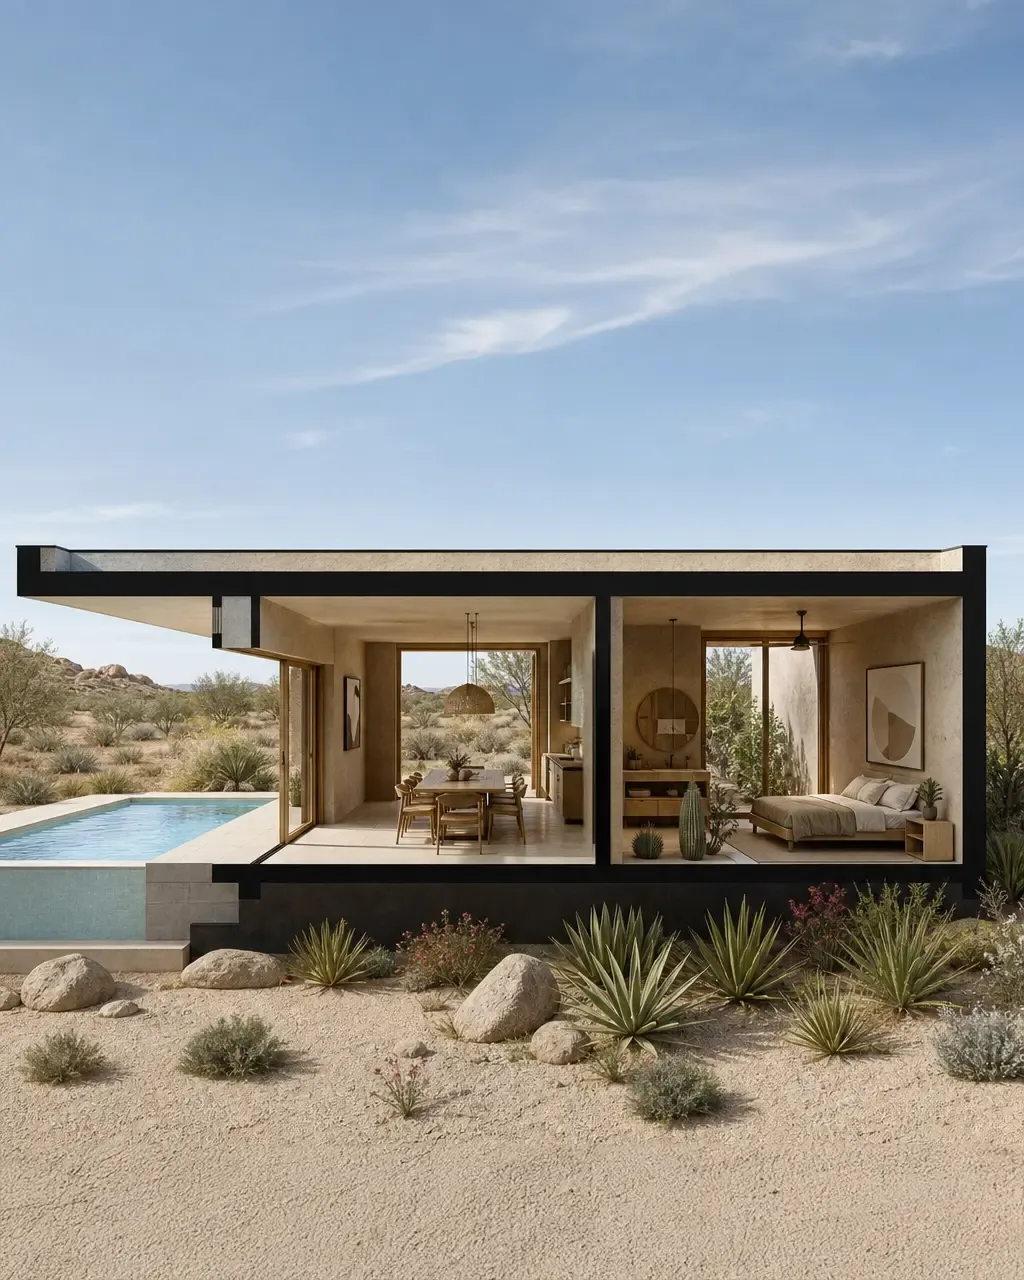
7. Visualize the project in section
Set up a section cut in your modeling software and frame the view around the spaces you want to explain. Bring an image of that view into Image to Render to explore finishes, light, and landscape. Here, the cut puts the pool, dining area, and bedroom in one frame, showing their levels and their relationship to the outdoors.
Try the workflow with your own site sketch or floor plan. Get started with Rendair.





How to Turn a Furniture Sketch into a 3D Model for an Interior Concept
A furniture sketch can set the mood of an interior before the...
 illustrarch Editorial Team4 Mins read
A Courtyard Reading Corner Takes Shape with Nano Banana 3
A narrow courtyard can look finished on plan and still feel uninviting...
illustrarch Editorial Team5 Mins read

From SketchUp View to Client-Ready Render: A Hands-On Look at Vizbase
Vizbase co-founder Mikus Zarāns shows how the browser-based AI renderer turns SketchUp...
illustrarch Editorial Team4 Mins read

OpenAI’s Astra Model Aims to Turn AI Into an Architecture Workflow Operator
OpenAI's Astra model, launched Sept. 3, 2026, runs multi-step tasks across software,...
illustrarch Editorial Team3 Mins read





Leave a comment